
Naturally Dyed Baby Onesie, Blanket or Swaddle
There has been much interest in dyeing textiles and clothing for our smallest family members using soft, natural colors and materials. White, 100% cotton baby clothing, blankets and swaddle cloths are readily available at most local stores or online. This tutorial will help you learn to dye any of those items using Fiberculture’s natural plant dye pigments.

What you will need:
1-2 Small pieces of Clothing/Textile Items made of %100 Cotton (or 100% Bamboo or 100% Linen)
1 Vial of .4 ounces Fiberculture Natural Dye Powder (Madder Root, Nettle, Black Walnut, Turmeric, Hibiscus, Safflower, Annatto)
1 Packet of .25 ounce Aluminum Acetate Mordant Powder
(Optional) String or Rubber bands for tying
Water

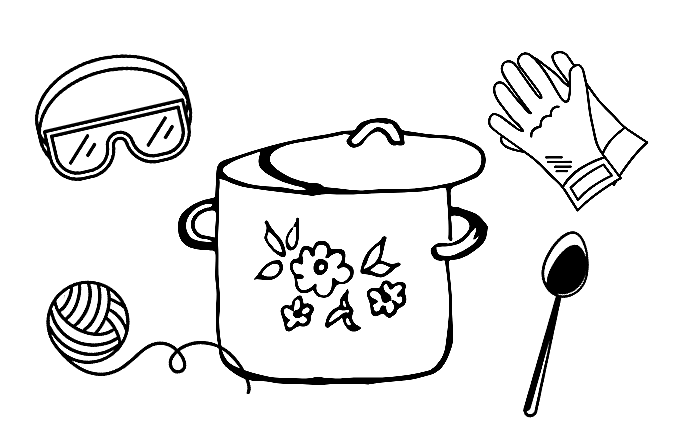
Additional Tools:
1-2 Stainless Steel or Enamel Pots (medium or large size) for boiling water (See safety instructions below)
Spoon (also stainless steel, wood, or plastic)
Fine strainer, coffee filter, or scrap cloth for straining liquid
Measuring Cup
Optional/ Recommended: Rubber Gloves, Dust Mask, Safety Glasses
*Note: Many of these kitchen items can be found used at second-hand stores or thrift shops very inexpensively and would be suitable for dyeing.
Before Starting : Safety First
When working with dyestuffs, powders, and mordants, while the ingredients are natural, it is still recommended to always wear waterproof rubber or plastic gloves, a dust mask to avoid inhaling fine powders or vapors, and plastic goggles to protect your eyes. Always work in a well-lighted and ventilated area. Read all safety notices and warning labels for each ingredient you work with.
Also remember to keep a dedicated set of tools (pots, spoons, measuring cups, etc.) to be used for Dyeing ONLY and to never use those tools for any other use after they are used for dyeing. Some mordants and dye ingredients may react to pots or tools made out of certain metals such as copper, aluminum, cast iron, etc. Therefore it is a good rule to always use stainless steel or enamel pots, as well as stainless steel, wooden, or plastic spoons and utensils when dyeing.

Prep your Items: Soaking, Scouring & Mordanting
Before dyeing your item(s) with natural dyes, you must prepare the goods in order to assure optimal dye absorption and color fastness. If you have limited time to complete your dyeing project, you can complete these following steps in advance and save your prepared fabric to be dyed at a later time.
Also, if you are dyeing together as a large group, you can complete these steps together using a much larger pot, and combining the fabrics and mordants together as each step dictates.
↠ Soaking: Soak your goods in water anywhere from half an hour up to a day, soaking opens up the fibers and allows for better dye absorption. Place your item(s) in the medium pot with enough water to cover. Soak. When the item(s) are thoroughly saturated, move directly to the next step.
↠ Scouring: Take your pot of submerged goods, and heat on low until it begins to simmer, stir occasionally to ensure the fabric doesn’t burn on the bottom. If you like you can add a drop of dishwashing detergent (like Dawn) to the water and stir to incorporate. Simmer for 10 minutes. Turn off the heat and allow to cool. Empty the pot, remove your fabrics and rinse clean. This step removes any factory residues or detergents which may affect the way the dye takes up into the fabric.
↠ Mordanting: Mordanting is the very important process of treating your goods with some form of water-soluble metallic salt which helps to bond the dye to the fiber, fabric or yarn. Most natural dyes require the use of a mordant in order for the dye to stay fixed on the goods and not rinse off. There are different types of mordants for different fibers and which give you different results. The most commonly used mordant for natural dyeing cellulose (plant) fibers in fabric like Cotton or Linen is Aluminum Acetate.
To mordant: Using a measuring cup, carefully stir your Aluminum Acetate powder into 1/2 cup of hot (not boiling) water until it is dissolved. Fill your medium pot with enough hot water to cover your fabrics, and stir the mordant mixture in.
After creating your mordant bath, add in your scoured, damp goods, gently submerging them into the pot. Cover the pot to retain the heat, and gently stir to rotate the goods every 10 minutes or so. Be sure the goods remain submerged the whole time. Let the goods sit in the mordant bath for at least 2 hours, leave for an additional 24 hours or overnight for better lightfastness of color.
Next, lift the goods from the pot, and rinse with cool water. Squeeze excess water from goods and proceed to dyeing, or if you completed this step in advance, you can store damp goods in a plastic bag or bucket for up to 7 days wet, or allow them to dry and label them as mordanted so they are ready for use in the future. Try to use the dried mordanted goods within a month, as over a longer period of time the aluminum acetate can begin to degrade the fiber.
Ok, your items are now well prepared! Next, we can move onto the fun part- working with the dye!

Extracting the Dye
When using natural dyes, the pigment and color must be extracted from different parts of the dye plants, such as leaves, stems, bark or roots. These dye stuffs can come as whole pieces or in ground form.
↠ Stir or whisk dye powder into pot with approximately 3 cups of water. Bring water to a simmer, and simmer gently for at least one hour, stirring occasionally and being careful not to burn. You can add some more water if the level gets too low. If you want to extract stronger color, you can soak the dyestuff in saucepan overnight BEFORE simmering.

↠ After the dye cools and/or soaks, strain it through fine muslin or cheesecloth and reserve the extracted dye water for your dye bath. Don’t worry if some dye plant pieces get into the dye bath or onto your wool or fiber during the process, they will shake out easily when the dyed item is dry. If you want a more unique and eclectic look to your finished fabric, don’t strain, and leave the dye pieces in the bath so they can leave interesting marks on the fabrics while dyeing.

Optional step: Using string or rubber bands, you can tie, fold, scrunch, or band your scoured fabric to create unique patterns and designs on the fabric when dyed. Do this BEFORE placing them into the dye pot. It is also fun to wrap your fabric around flowers or leaves and then tie it in a bundle for cool effects. Marigolds, daffodils, blackberry or raspberry leaves, black walnut tree leaves, and hollyhocks work well and can usually be found no further than your own back yard! Experiment to make it fun!
Create your Dye Bath and Dye the Fabric!
↠ Pour your extracted/ strained dye into the large pot, then add just enough water which will cover your fabrics/item(s). Stir well to incorporate.
↠ Add your damp, soaked and scoured goods into the pot and submerge gently, being sure that every part of it is covered. Slowly bring water in the pot to a simmer (190°F). Simmer for at least 1 hour for best color absorption. Carefully turn the goods every 10 minutes or so for even dyeing.
After simmering, you can turn off the heat and allow the goods to cool completely in the pot for best color absorption. You can also leave the fiber to soak in the dye bath overnight if you choose. If there is any dye color left in the pot, you can save and reuse the bath for lighter shades.

Finishing:
Carefully remove goods from the cooled dye bath, and squeeze any excess water from them. Fill a tub or sink with cool water and gently submerge the goods into the water, carefully squeezing out any dye. Repeat this process of dunking, lifting, and refilling the tub, until the goods rinse clear. Hang goods or lay flat to dry out of direct sunlight. It may seem like a lot of “dye” will rinse off in this stage, however that is normal- natural dyeing usually results in soft, pastel shades- much darker, more vibrant shades can be achieved by “over-dyeing” pieces, repeating the process again and again until the fabric is to the desired depth which is possible with each plant dye.

And, you’re all done!
Congratulations on completing this tutorial and taking this journey into natural dyeing! Natural dyeing is a fluid, experimental art form with a forever unique and individual outcome. All natural fabrics, dyes and pigments impart their unique qualities on the finished product. Just as nature is always changing and adapting, so will the natural dye experiences. I find it a fun and exciting adventure each time I do it, and hope you do too!
Visit the shop for more natural dyeing materials, tools, and inspiration!
Also, feel free to contact me here if you ever have any questions or comments.
As always, have fun, and happy dyeing!!
-Serena, Owner/ Textile Artist